Instructor Manual
Using Track to Manage your Course/Sections

Figure 4.1: Track Page
Demo Data

Figure 4.2: Student Demo Data
To view the demo data of students click the close button at the top right corner of the box. You will be able to see demo data of students with sample watermark on it & a pink box will appear on the bottom of the table. If you want to hide the sample watermark from the demo data, click the close button of the pink box.

Figure 4.3: Sample Watermark From Demo Data
Roster

Figure 4.4: Roster Tab
Set Tag

Figure 4.5: Track Tab with Set Tag Option
To remove a previously added set tag, click the close symbol. To add a new tag, type your tag in the Tag box. It will look for a suitable match based on your search, which will enable your tags to be consistent across multiple students.

Figure 4.6: Set Student Tag Modal Box
If no match is found, click enter and then click the Save button.

Figure 4.7: Set Student Tag Modal Box with Save Button
Set Section

Figure 4.8: Track Tab with Set Section Option
Select another section to move student from one section to another. Click the close button to remove student from that particular section. Click the Save button after selecting or removing course.

Figure 4.9: Set Student Section Modal Box with Save Button
Change Password
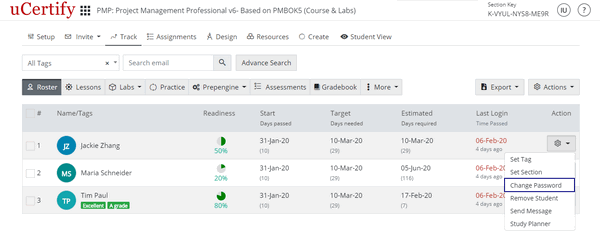
Figure 4.10: Track Tab with Change Password Option
Provide the required details and click the Save button.
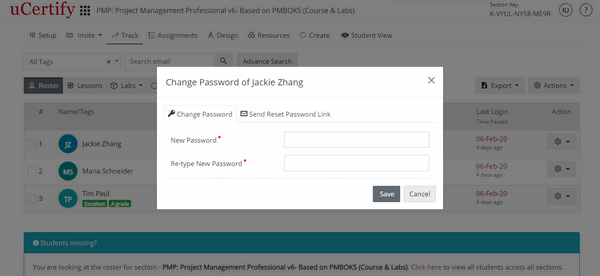
Figure 4.11: Change Password Modal Box with Change Password Tab
To send the reset password link to your student, click the Send Reset Password Link tab and click the blue button.
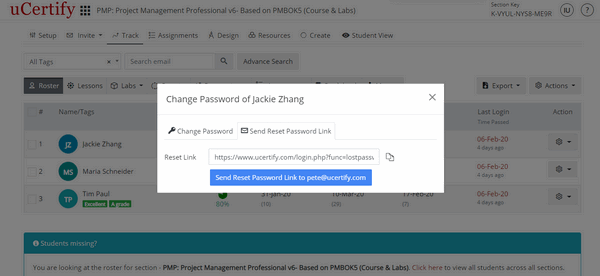
Figure 4.12: Change Password Modal Box with Send Reset Password Link Tab
Remove Student

Figure 4.13: Track Tab with Remove Student Option

Figure 4.14: Track Tab with Confirmation Modal Box
Send Message

Figure 4.15: Track Tab with Send Message Option

Figure 4.16: Send Message Modal Box
Study Planner

Figure 4.17: Track Tab with Study Planner Option
How to Filter Students
You can search for student via three methods:
- Filter by Tag
- Filter by Email
- Advance Filter

Figure 4.18: Track Tab with All Tags Drop-down

Figure 4.19: Track Tab with Search email Box and Search Icon

Figure 4.20: Track Tab with Advance Search Button

Figure 4.21: Advance Search Modal Box with Search Button
Export
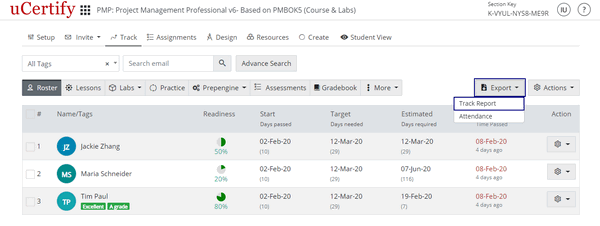
Figure 4.23: Track Tab with Export Button Option
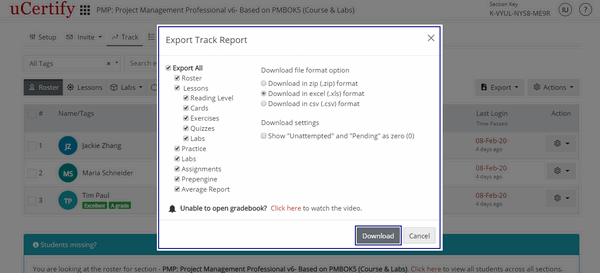
Figure 4.24: Export Track Report Modal Box with Download Button

Figure 4.25: Track Tab with Export Button Option

Figure 4.26: Export Attendance Modal Box with Download Button
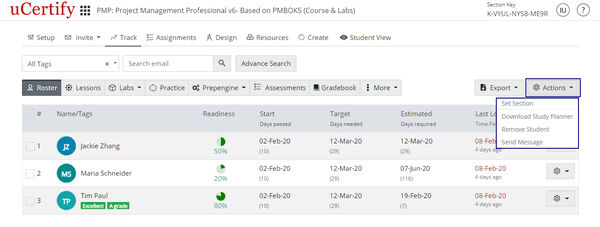
Actions
Lessons

Figure 4.28: Lessons Tab
Labs

Figure 4.29: Track Tab with Labs Tab Options
Practice

Figure 4.30: Practice Tab
You can also change the points of your students. To do so, click on any grade point. A modal box will open showing the test history. Click on the settings menu and then select the Review option.

Figure 4.31: Grade Point Modal Box of Student

Figure 4.32: Grade Point Modal Box with Review Option
You can delete your students test. To do so, select the Delete test option from the settings menu. Click the Yes button to delete the test.

Figure 4.33: Grade Point Modal Box with Delete Option
Prepengine Tab
This will show readiness or preparedness percentage attained by the students in Prepengine. This tab can be viewed in two views: Table view and Student view.

Figure 4.34: Track Tab with Prepengine Tab Options
Assessments
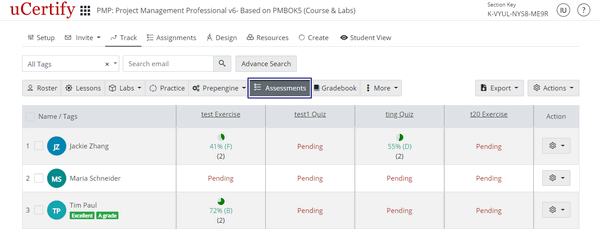
Figure 4.35: Assessments Tab
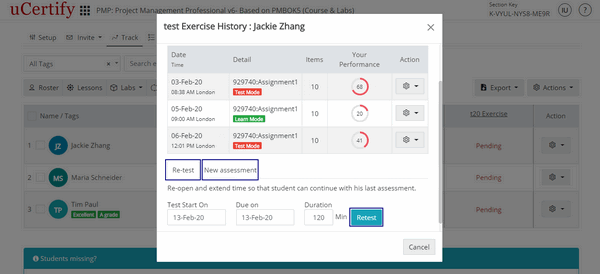
Figure 4.36: Test History Modal Box with Retest Button
Gradebook Tab

Figure 4.37: Gradebook Tab with Define Gradebook Button
You can export the gradebook of your students. To do so, click on the Export button and select the Gradebook option.

Figure 4.38: Gradebook Tab with Export Button Options
Select the file format option in which you want to download the gradebook and select the Percentage or Points option. Click the Download button. The gradebook will be downloaded with the settings provided by you.

Figure 4.39: Export Gradebook Modal Box
More
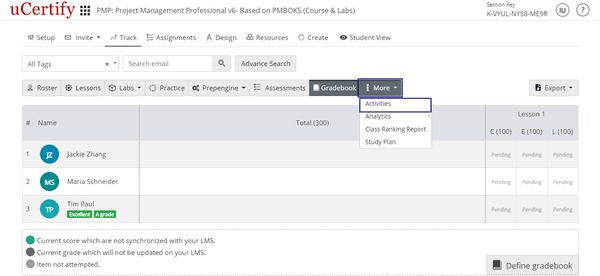
Figure 4.40: More Tab with Activities Option
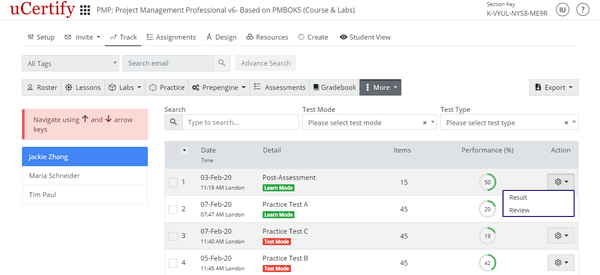
Figure 4.41: Activities Page with Option to View or Delete Test

Figure 4.42: More Tab with Analytics Options
In Test Analytics, you can filter and export the results on the basis of the following three Report types:
- Best Score
- Last Score
- All Attempts
To do so, on the Test Analytics page, click the Report Type drop-down, and select the required filter criteria.

Figure 4.43: Test Analytics Page with Report Type Options

Figure 4.44: More Tab with Class Ranking Report Option
To change the section, click the Section drop-down and select the desired option. To view reports on the basis of the test type, select the desired test type from the drop-down.

Figure 4.45: Class Ranking Report Page with Section and Test Type Drop-downs
To view the study planner of your students enrolled in your section/course, click the More tab, and select the Study Plan option.

Figure 4.46: More Tab with Study Plan Option